With Scheduled Tasks, you can schedule any script, program, or document to run at a time that is most convenient for you. Scheduled Tasks starts every time that you start Windows XP and runs in the background, and it starts each task that you schedule at the time that you specify when you create the task.
To open Scheduled Tasks:
1. click Start--> click All Programs--> point to Accessories--> point to System Tools--> and then click Scheduled Tasks.
To schedule a new task:
1. Double-click Add Scheduled Task to start the Scheduled Task Wizard, and then click Next in the first dialog box.
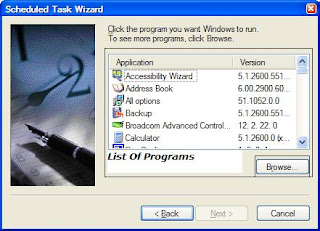
2. The next dialog box displays a list of programs that are installed on your computer, either as part of the Windows XP operating system, or as a result of software installation.
Use one of the following procedures:
- If the program that you want to run is listed, click the program, and then click Next.
- If you want to run a program, script, or document that is not listed, click Browse, click the folder and file that you want to schedule, and then click Open.
3. Type a name for the task, and then choose one of the following options:
- Daily
- Weekly
- Monthly
- One time only
- When my computer starts (before a user logs on)
- When I log on (only after the current user logs on)
4. Click Next--> specify the information about the day and time to run the task--> and then click Next.
5. Type the name and password of the user who is associated with this task. Make sure that you choose a user with sufficient permissions to run the program. By default, the wizard selects the name of the user who is currently logged on.
6. Click Next--> and then click Finish after you verify the choices that you have made.


No comments:
Post a Comment